SparkFun Sno Shoe – Arduino Compatible HDMI [Discontinued]
Experimental Product: SparkX products are rapidly produced to bring you the most cutting edge technology as it becomes available. These products are tested but come with no guarantees. Head on over to the SparkFun forum for support or to ask a question.
Important Note: SparkX products are not normally returnable – especially if they have been modified. Please consider this before reaching for the soldering iron!
We love the Alorium Technology Snō Development Board! Alorium have done a really great job in integrating an ATmega328-compatible core into the FPGA, which you can then program from the Arduino IDE and access the features of a Verilog Xcelerator Block (XB) from normal Arduino code. You can even include your favourite SparkFun libraries and use them as if you were running the code on a RedBoard!
One of our engineers loves the Snō so much, he took one on holiday with him and remixed Sameer Puri’s HDL Util Verilog so it would run on the Snō as a VGA HDMI Xcelerator Block. The XB allows you to display VGA text and graphics on any monitor that supports 640×480 pixels.
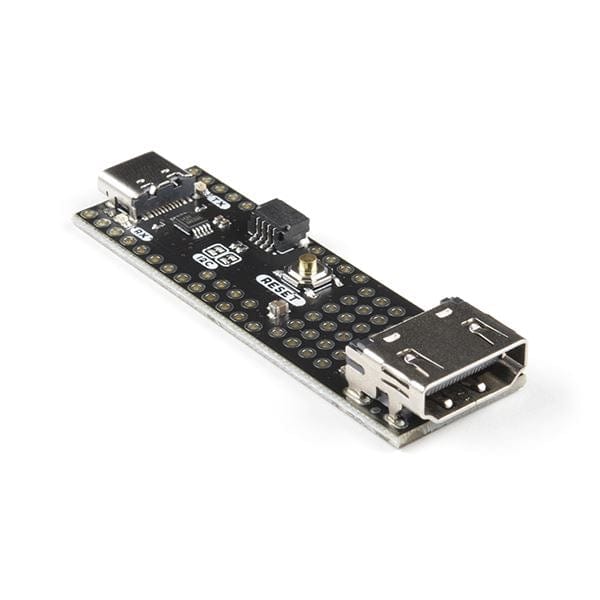
You can of course use an HDMI breakout board or cable to connect the Snō’s pins to your monitor. But why not do the job properly and equip your Snō with a Snō Shoe?! The Snō Shoe will make life easy for you. It provides:
- A full-size HDMI socket connected to four pairs of (differential) FPGA pins
- A Qwiic I2C connector so you can easily attach your favourite SparkFun Qwiic boards
- A USB-C socket for power, configuration and Serial communication
- A CH340E USB interface, so you don’t need to use a separate FTDI breakout to configure the Snō
You can use standard Break Away Header Pins to connect your Snō to the Shoe. (Soldering is required!). If you want the Snō to be removable afterwards, you could use breakaway pins on the Snō and female headers on the Shoe. The Snō Shoe has been designed so you can mount the Snō on the top of the Shoe, or underneath, depending on your preference. A reset button and I2C split pads are accessible in both configurations. Long Break Away Headers should allow you to connect some of the breakout pins to standard breadboard.
Features
- USB-C Connector for power and Serial connectivity
- Qwiic I2C Connector
- Full-size HDMI Connector
- Provides access to the TMDS Data and Clock pins only
- The HDMI I2C pins are not supported
- Reset Button
- CH340E USB interface
- USB TX & RX LEDs
- Qwiic I2C pull-up split pads
Documents
- Schematic
- Eagle Files
- GitHub repo
- VGA HDMI Xcelerator Block
- VGA HDMI XB Examples
